
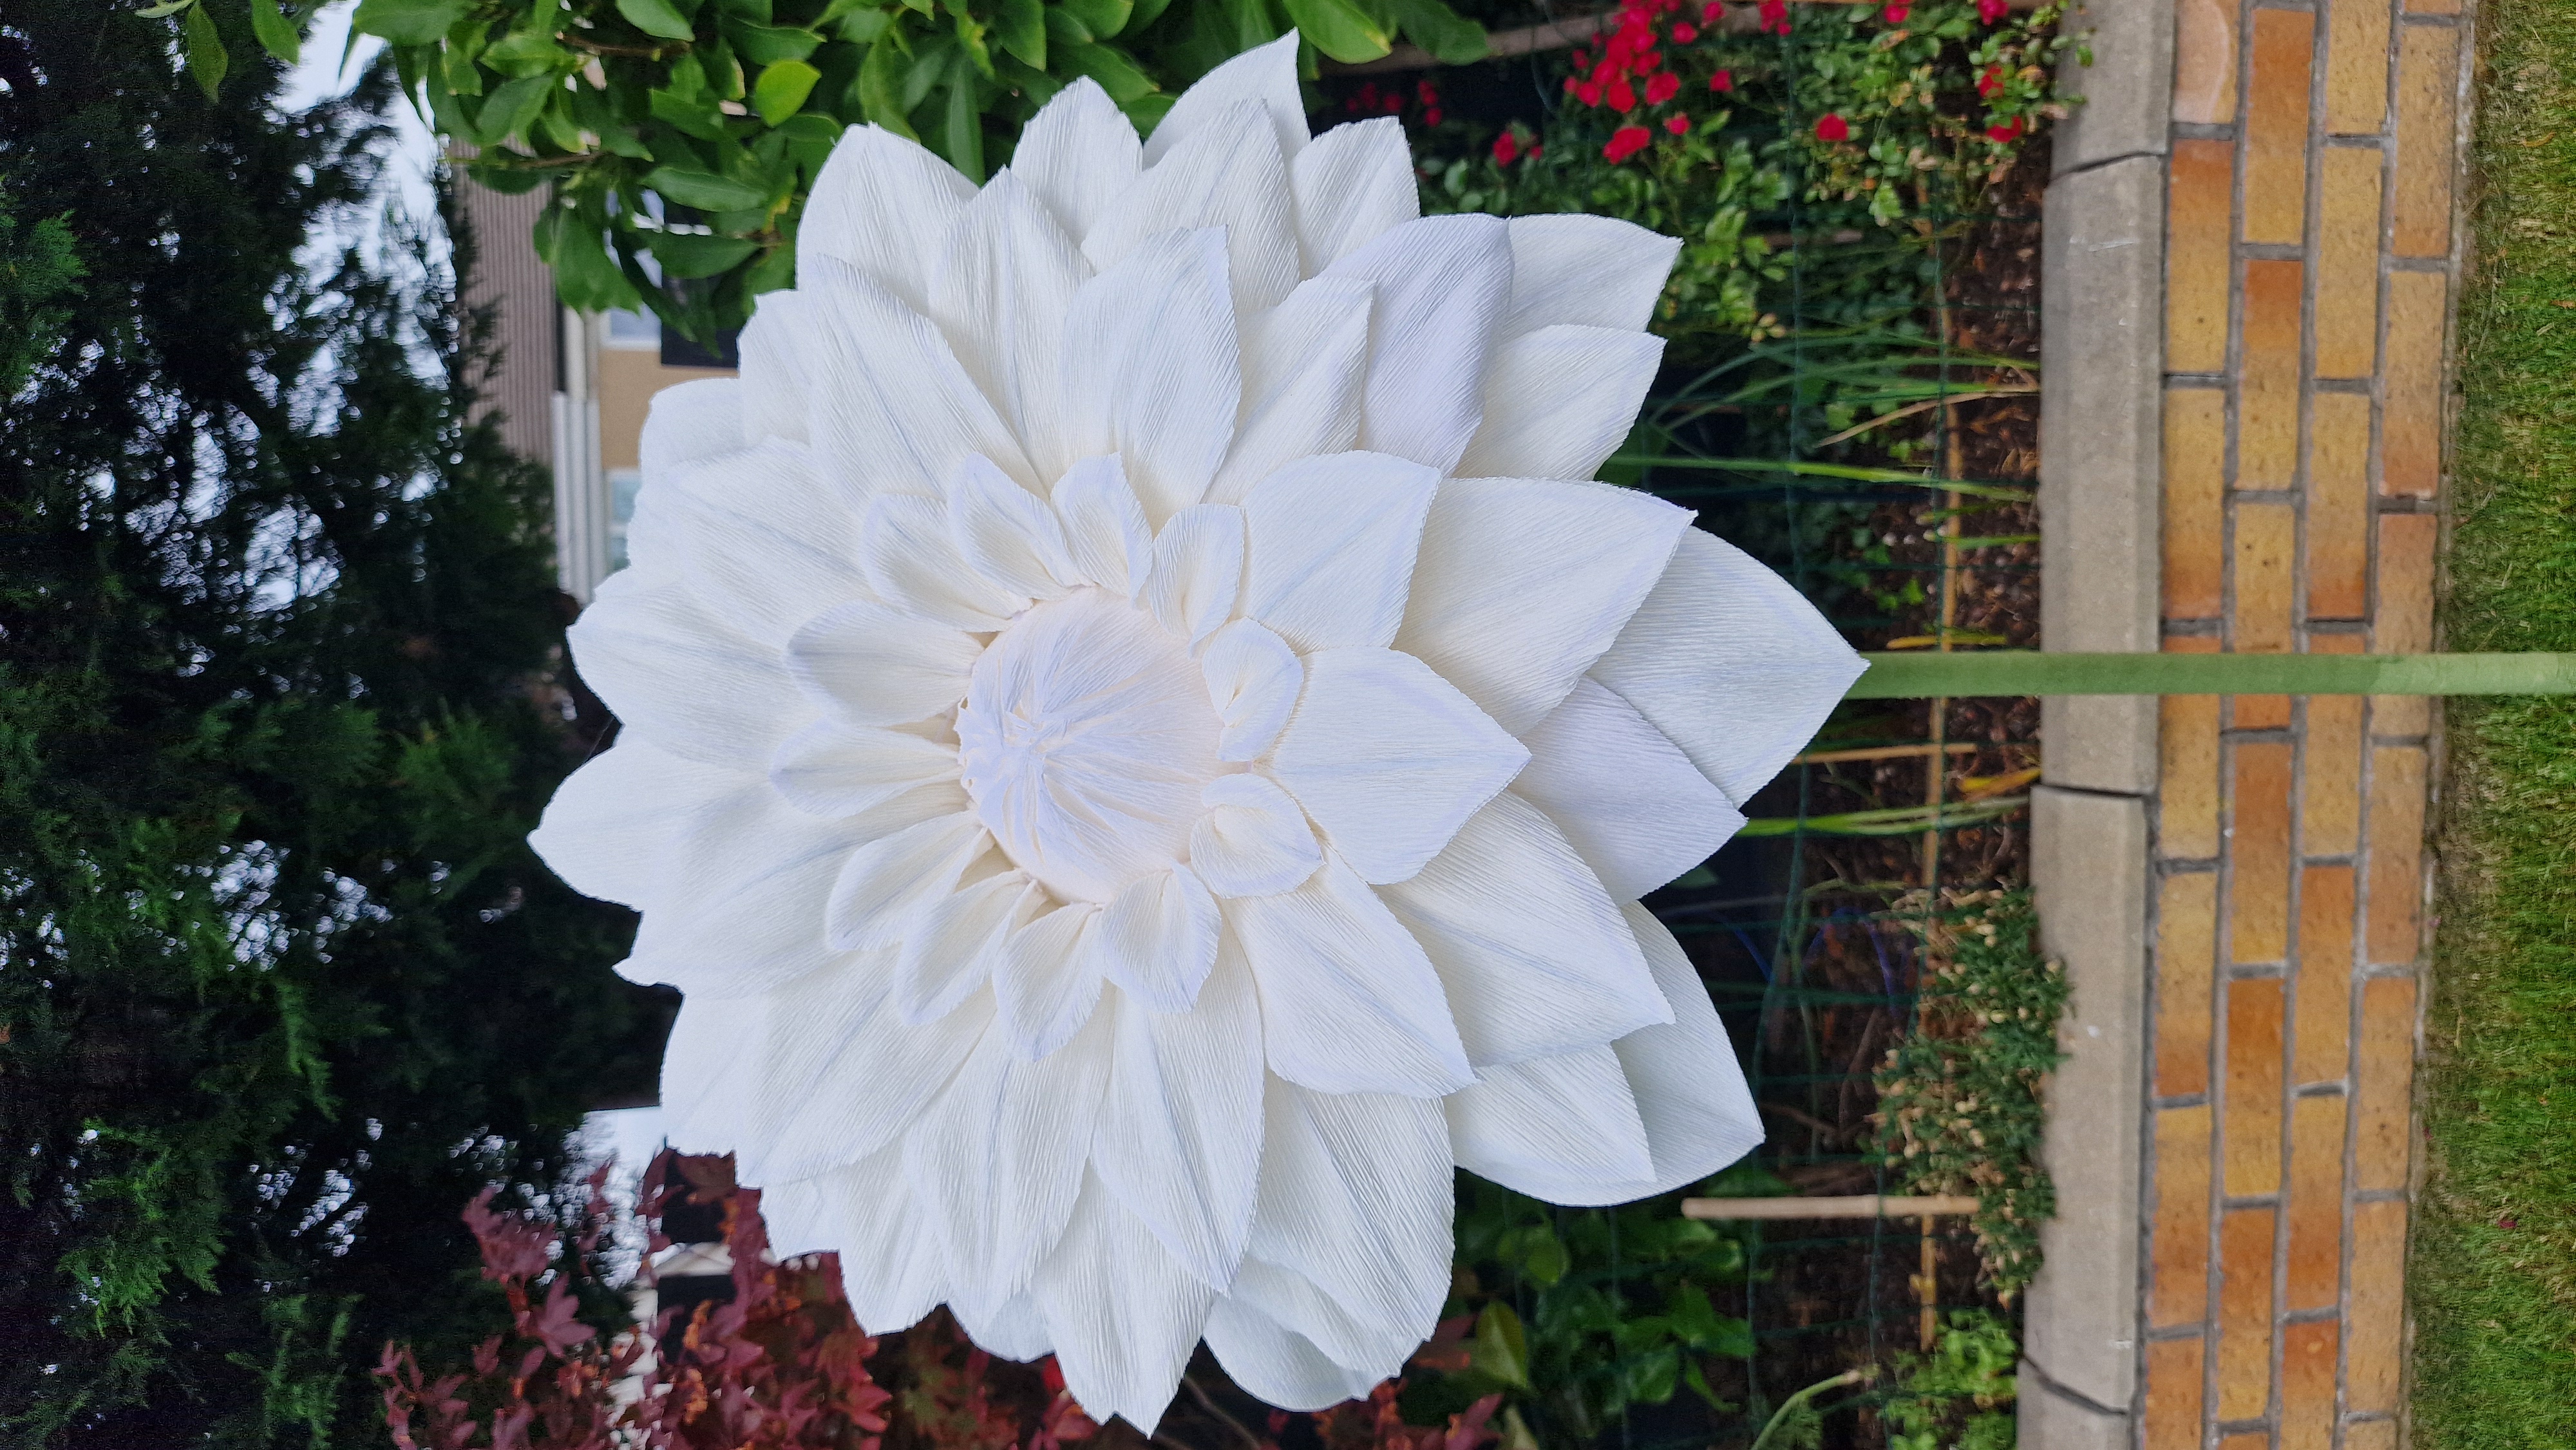
How to Make a Giant Paper Icelandic Poppy
- Cat Atmouni
- Apr 30, 2025
- 3 min read
Updated: Jul 4, 2025
Bring the soft elegance of Icelandic poppies into your handmade creations with this easy-to-use paper flower template! Designed to mimic the delicate, ruffled petals of real poppies, this digital petal pattern is perfect for crafters, florists, and DIY decorators who want to add a touch of botanical beauty to their projects.

What You'll Need:
180g Italian crepe paper (green and yellow for the centre, orange for the fringing, peach for the petals.)
15cm polystyrene ball
15cm Cardboard circle
Glue gun
Stapler
Ruler
Step 1:
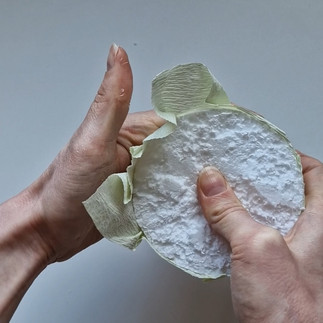
Cut 1 strip of paper (I use a pale green for the centre of the flower) 10cm x 20cm.
Stretch the paper then cover the polystyrene ball.
Glue all round the edges of the polystyrene ball to secure the paper in place.
Cut the excess paper off so the edge of the ball has no paper hanging over.


Step 2:
Cut 4 strips of paper (I use a pale yellow for the centre of the flower) 3cm x 20cm.
Stretch the paper then twist the paper.
Attach the twisted pieces of paper crossing each one in the centre and gluing the edges down.
Cut the excess paper off so the edge of the ball has no paper hanging over.


Step 3:
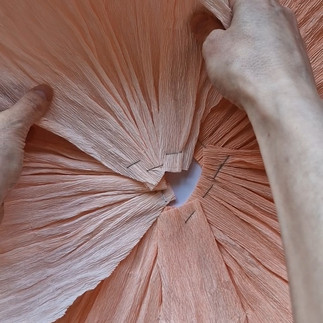
Cut 3 strips of paper orange paper 20cm x 10cm.
Fold and few times and then cut small strips approximately 0.5cm in width.
Make sure you don’t cut all the way up. Leave about 2cm from the top.
Open your paper back up and twist each snip.
Complete these steps for your next 2 pieces of paper.


Step 4:
Wrap your 3 pieces of fringed paper around your poly ball, gluing at the bottom
Once dry, you can spread your fringing out to expose the flower centre


Step 5:
Download and print your petal pattern https://www.velvetrosedesigns.co.uk/product-page/icelandic-poppytemplate
Place your patten on the fold of your Italian crepe paper and cut around.
Create 8 petals (You can add more if you wish but for this tutorial I used 8).
At the top of the petal, move your fingers back and forth in opposite directions to gradually stretch the paper.
Be careful not to stretch too much as the paper might rip.
Then lay your petal on it’s side and gather together.


Step 6:
Twist the entire petal and then scrunch up into a ball.
Gradually begin to open the scrunched paper back up. Don’t stretch out completely as you want to keep some of the folds in place.
Gather the bottom straight edge and staple some of the folds in place.


Step 7:
Cut a 15cm circle from thick card. and mark the centre.
Take your first petal and glue the back.
Attach your first petal about 4cm in from the edge of the cardboard circle.
Attach the next 3 petals in a cross formation.


Step 8:
Add your next 4 petals making sure they meet in the middle.
Don’t lay the petals exactly on top of the first layer. Offset them so that they cover the crease of the adjoining first layer petals
Then glue the back of the poly ball and attach in the centre of the flower.
Your flower is complete.
You can stretch the petals as much as you like to get the desired look.
You can add a look to the back sing wire to hand on the wall.


I’d love to see what you make! If you create your own giant paper Icelandic poppy using this tutorial, please tag me on Instagram — @velvet_rosedesigns — so I can admire your beautiful work and share it with our creative community.
A Quick Reminder
This template, booklet, and video tutorial are for personal use only.
You may not:
Sell or redistribute this template or instruction booklet.
Recreate or share the video tutorial in any form.
Use this content for commercial purposes.
Thank you for respecting my work and supporting independent artists. Happy crafting!
— Cat

Comments